5G Planning Tool
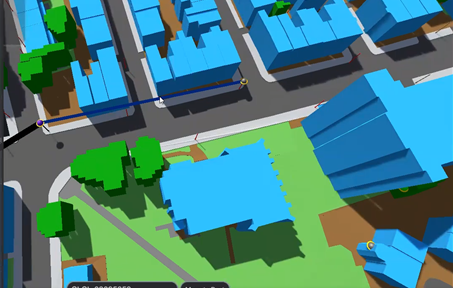
CGA Simulation designed a 5G network planning tool using ‘digital twin’ technology. The team created an online copy of Kensington, Liverpool, for the Liverpool 5G Health and Social Care project.
The tool enables those planning a 5G network to assess an environment by working offline first to accurately plot line-of-sight for 5G receivers and to work around obstacles like trees or high buildings. This reduces the manual workload and resources required to plan a 5G network, significantly reducing costs and time required.
Ever wondered how we planned @Liverpool5G‘s mesh network? We’re releasing a series of short films to explain. For more info on our planning tool and how it could be adapted to suit your use case get in touch at jon@cgasimulation.com
Planning Tool Tutorial
The Basics
- If you click right-mouse, you can move around and change the view
- Scroll to zoom in and out and hold the mouse scroll to move around the screen
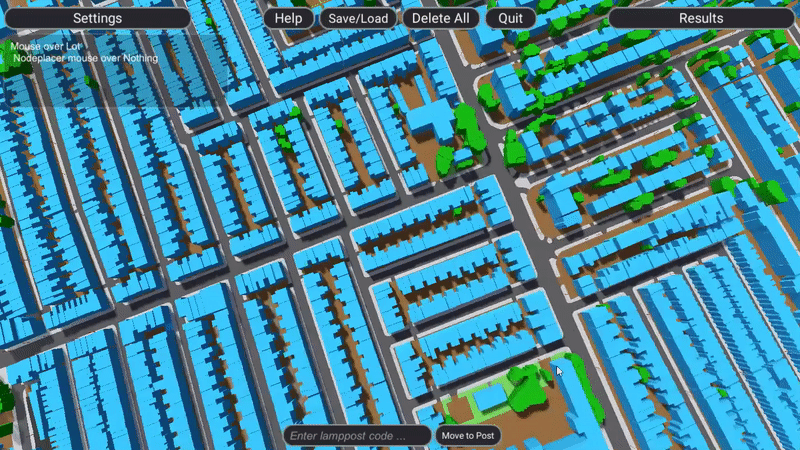
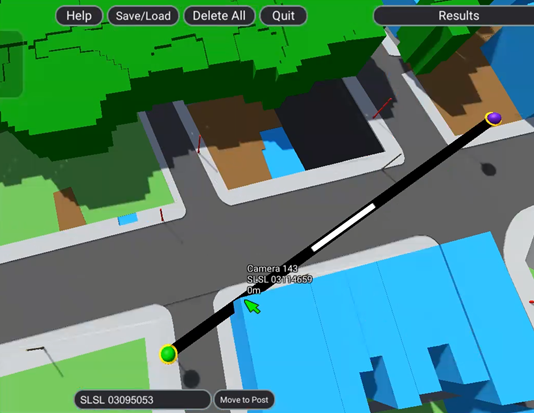
- If you want to go to a specific lamppost, type in the code and click move to post. It will take you directly above that lamppost. If you then zoom in, you’ll see the post that you need.
Creating your network
- First, you’ll need a POP site. You can either add the POP to a camera or to a lamppost.
- If you’re adding the POP to a lamppost, you’ll need to work out how to get there from the nearest CCTV. Say you’re planning to add fiberoptics from a CCTV to a lamppost – you’re essentially turning the lamppost into a POP.
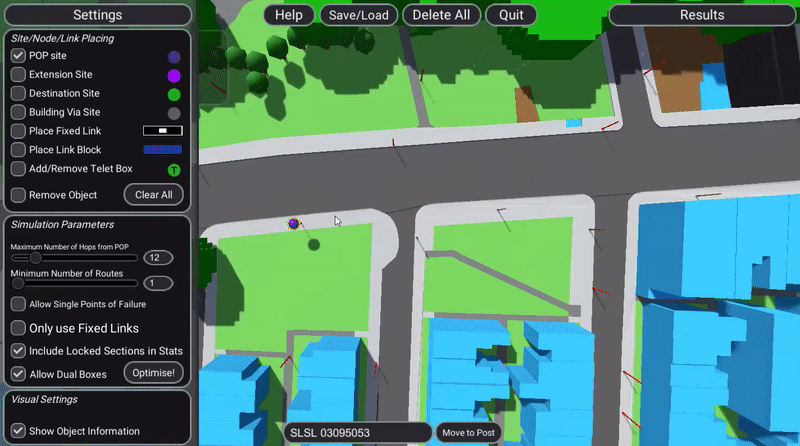
Here we have a POP on a lamppost and a POP on a CCTV… and we’re preparing to add some Destination Sites. We could add them to that lamppost shown, or the side of that building.
- Imagine this building is a care home and you’ve placed a destination site on the side of that care home.
- We’ve deliberately placed this destination site somewhere awkward because then you can use the Building Via Site. These are things that you can add to the side of the building but that not your destination – but, you know that you need to get around them e.g. a tricky corner; by placing a Building Via Site in the path of the link between destinations it should work to ensure that the destinations can be arrived at via the BVS pinging up.
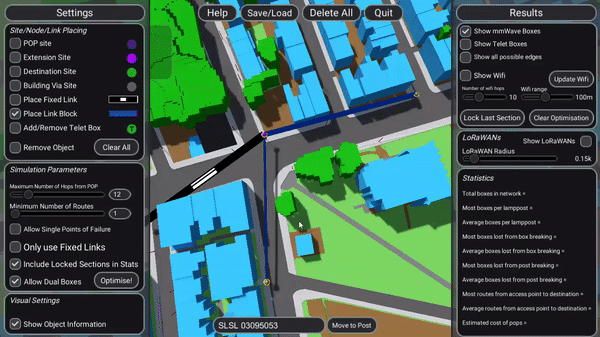
- Place Fixed Link: links that you know work and you want the program to use
- Iterate of usage going back and forth: make a plan, survey to check that it works, and then the fixed place link is the iterate of these processes
Example
See how this link is clipping the building – if we let the program optimize itself, it would say that this link wouldn’t work but imagine that you know that this CCTV can see that lamppost
- By adding a fixed link you are letting the program know that this link works
The opposite of a Fixed Link is a Link Block:
Example:

Say if we know that this camera to lamppost link doesn’t work because we know a tree is blocking visibility, then by adding a Link Block we alert the program of this.
Fixed Link: Telling the program it can do something it previously thought that it couldn’t
Link Block: telling the program it can’t do something that it previously thought it could
Telet Boxes:
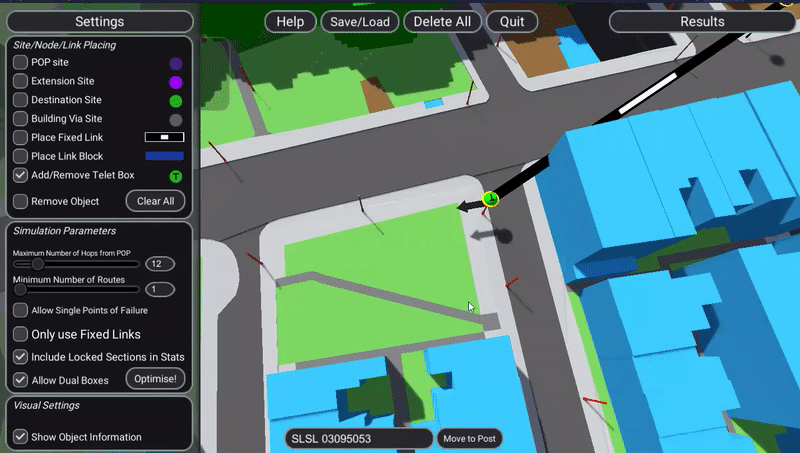
- Add Telet Box
Putting two POPs in a scene means that the tool will look for the nearest one – if for some reason it can’t reach the closest one, it will go to the next available POP
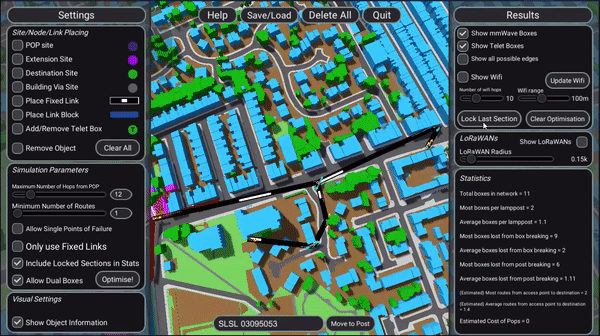
Simulation Parameters
- Once you have added all your Site/Node/Link settings, go to parameters
- Maximum Number of Hops from POP = latency (the distance you can go before you lose accuracy). 12 is the tried and tested best setting here.
- Minimum Number of Routes: how many routes the tool will find. 1 is the current default (the route from 1 POP) but when making more robust networks this number will increase and increase your network resistance
- Allow Single Points of Failure: doesn’t mean anything with one route but if you’re making a complicated mesh network with more routes then allowing Single Points of Failure will mean that multiple routes can ping through the same lamppost. If you do not allow for Single Points of Failure, it will force the tool to find other ways.
- Only use Fixed Links: useful for importing an already-existing network. If you’re manually creating something rather than building on top, you can choose to only use the fixed links that you have made.
- Include Locked Sections in Stats:
- Dual Boxes (can point in both directions)
When you’re finished with your Site/Node/Link Placing and Simulation Parameters, optimize what you have done:
Results
- mmWave Boxes: visuals you can turn on and off so you can see what they are and what they are doing:
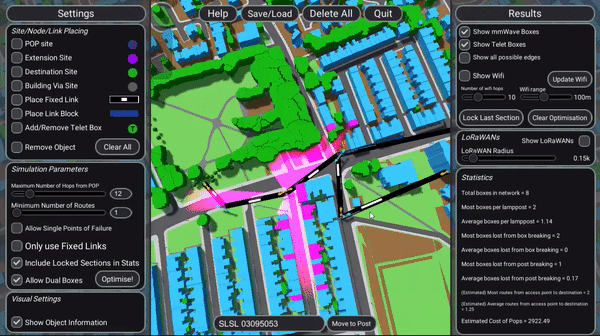
- Telet Boxes: visuals you can also turn on and off
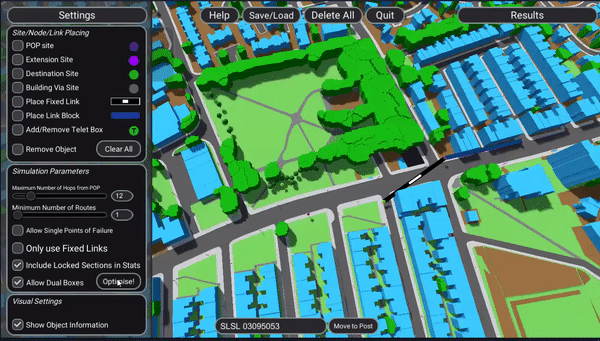
- Show all possible edges: important for surveying and identifying issues and dead spots that you can’t get to at all with the lampposts so you would have to add things to buildings or build new street furniture to get around:
- Show Wifi: based on adding Wifi to all the lampposts:

Statistics let you know how well your network is operating.
The Next Step
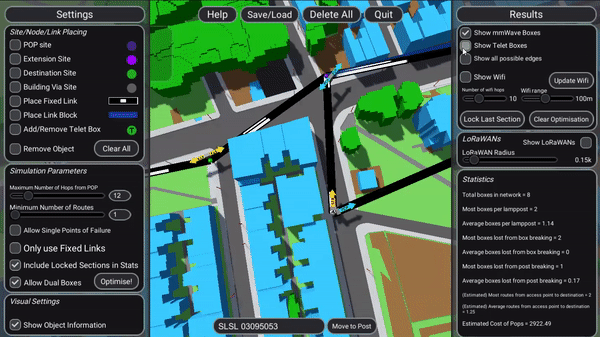
- Start turning nodes off and on to see the effect it has
- Red route = broken route
- Estimated Cost of Pops: if you’re solely using CCTVs, this would be 0 but with things like fibreoptics the tool will give you an estimate of the cost of getting them on the ground
Example: If you spot any problems
- In our example below we may have surveyed the area and noticed that the tree between those two nodes is too big and this route won’t be feasible
- To make changes we will first clear the optimisation
- Next, we will put a link block between these two points
- Optimse again
- See what solutions/new routes the tool supplies:
- When you’re happy with your result press ‘Lock Last Section’ to save your work when you next clear the optimisation
Extension Site:
- Marking a site which everything must pass from = forcing a Destination Site to ping from an Extension Site before a POP
When you are completely happy with your plan, you can lock everything by clicking ’Lock Last Section’.
- To save everything ‘Lock & Save’
- You can also save a screenshot here